Another customization in WSS/MOSS! You can install your own custom feature other than out-of-box features that offered WSS/MOSS. You can add new actions or menus in any location in WSS/MOSS like Site Settings, Site Actions, Item Context Menu, and etc in Standard Menu.
By default, there have 5 groups - Look and Feel, Users and Permissions, Gallaries, Site Administration, Site Collection Administration.
To install new custom feature, create a new folder in C:\Program Files\Common Files\Microsoft Shared\web server extensions\12\TEMPLATE\FEATURES. I name the folder as MyCustomGroupAndAction. Then we need to create an XML called feature.xml and another xml file that contains the feature definition. (featuredef.xml)
Feature.xml has several elements - <Feature>, <ActivationDependencies>, <ElementManifests> and <Properties> but the important ones are :
1.
<Feature> (the root element) - Defines feature ID, scope (site, collection, etc), description and title.
2.
<ElementManifests> - defines the feature definition, which links to the xml file that contains the definition.
In feature.xml
<?xml version="1.0" encoding="us-ascii"?>
<Feature  Id="F863C1CF-897D-49c6-8600-7E6F3FC9D653"
                Title="My New Feature"
                Description="This is my new feature"
                Scope="Web"
                xmlns="http://schemas.microsoft.com/sharepoint/">
    <ElementManifests>
        <ElementManifest Location="featuredef.xml" />
    </ElementManifests>
</Feature>
The
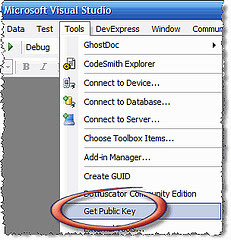
ID of the feature is unique GUID. You need to generate new GUID for each new feature being created. To generate the GUID, you can go to Visual Studio -> Tools Menu -> Create GUID or launch the tool at
C:\Program Files\Microsoft Visual Studio 8\Common7\Tools\guidgen.exe.
The
location attribute of <ElementManifests> specifies the location of feature definiton XML file.
In featuredef.xml
<?xml version="1.0" encoding="us-ascii"?>
<Elements xmlns="http://schemas.microsoft.com/sharepoint/">
  <CustomActionGroup
     Id="MyCustomGroup"
     Location="Microsoft.SharePoint.SiteSettings"
     Title="My Custom Group" />

 <CustomAction Id="MyCustomFeature"
  GroupId="MyCustomGroup"
  Location="Microsoft.SharePoint.SiteSettings"
  Title="New Custom Feature"
  Sequence="50">
  <UrlAction Url="_layouts/layoutdesign.aspx"/>
 </CustomAction>
</Elements>
The <CustomActionGroup> specifies the definition of new group to be created.
Location attribute specifies where the custom group will reside. In this example, "Microsoft.SharePoint.SiteSettings" indicates that the new group will be in the Site Settings menu of WSS sites. Check
Location and Group ID in MSDN for more information. Text in the
Title attribute is the name of the group.
<CustomAction> is where the custom feature definition set. The
location attribute MUST BE same as the location being specified in the group that the custom feature points to (in GroupID attribute). <UrlAction> element merely specifies URL of the custom application page.
It is about to install the feature ! Go to the command prompt, type
C:\Program Files\Common Files\Microsoft Shared\web server extensions\12\BIN>stsadm -o installfeature -name MyCustomGroupAndActions
The feature has just been installed. However, you need to activate the feature before using it. To activate it, you can type
stsadm -o activatefeature -filename MyFeature/feature.xml -url <server url>
or
go to http://<server name>/_layouts/manageFeatures.aspx, and you will see this

Click "Activate" button to activate the feature. Go to "Site Settings" and you will see this

You have completed installation of new custom group and feature !!


